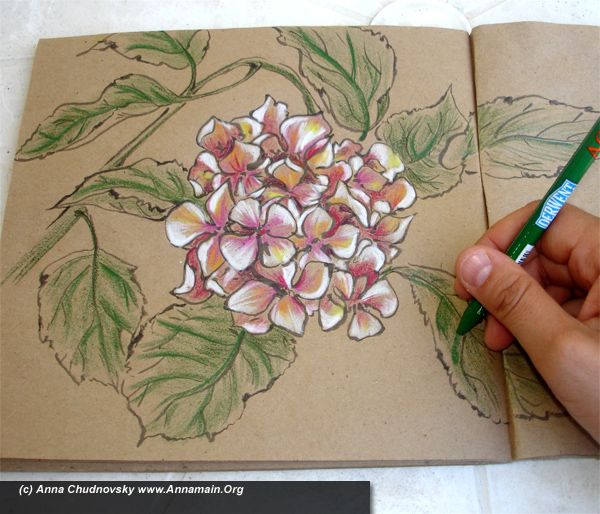
Ok, this is the last part of the master-class and now you can finish the picture to the complete result:
Our last master class was finished on the 7 step- "by white again make smoother the edge between white ends of petals and another colors".
Now it`s the time for magic and our colours will be different. The way of colours from the one tint is the shortest way to create a boring picture. As you want something impressive and live you should mix colours with your emotions and feelings.
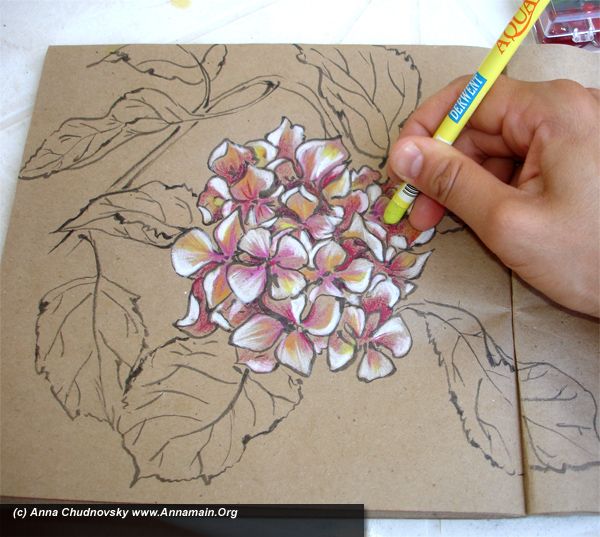
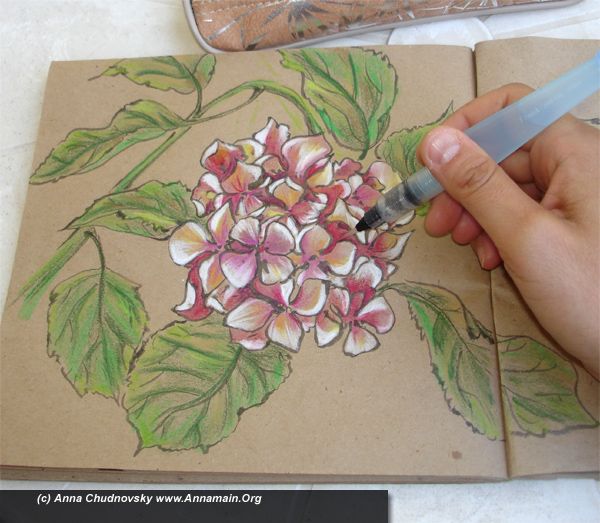
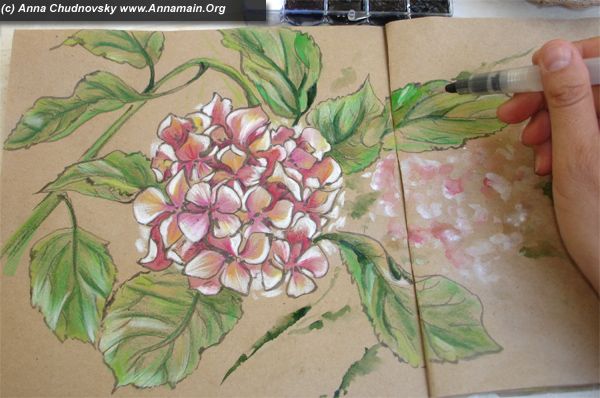
Now then it`s the 8th step - use orange pencil to create sun spots on the petals. Let the picture be impregnated with sunpower. Feel how the energy of colours flows from your fingers to the paper. This is the real power we need to live, and flowers need it too. So draw it!
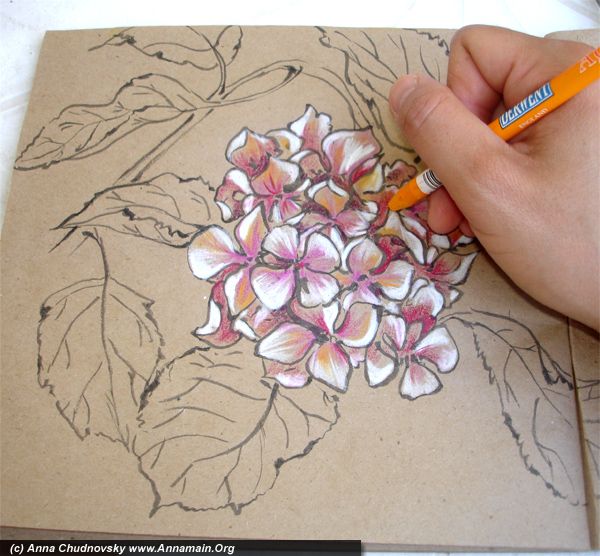
9 - use yellow pencil the same way. As you do it the picture becames radiating, it starts to send out the sun and that way picture becames interacting with onlooker.
10 - that time we starts with the leafs. Use dark green pencil to draw the leafs as you see on the picture. It is easy but the point is to make strokes along natural streaks of leafs.
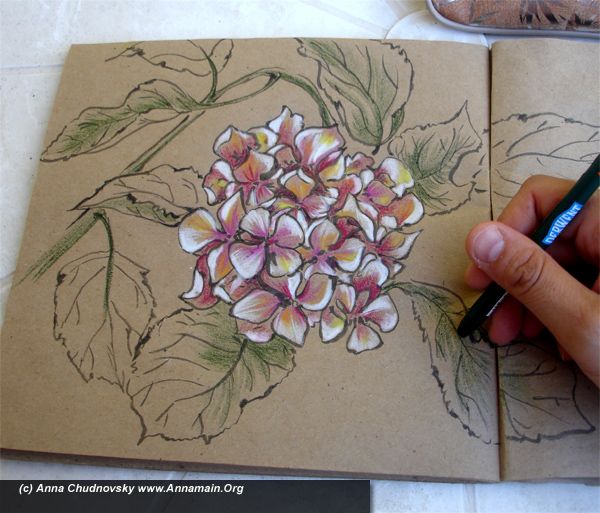
11 - use medium green colour to make the streaks of the leafs. Press the pencil a bit more then in 10 step.
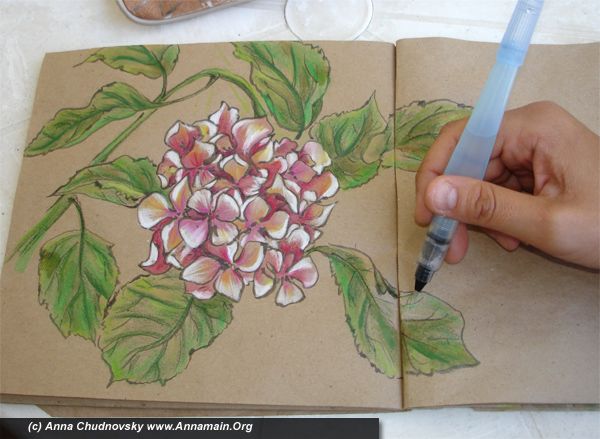
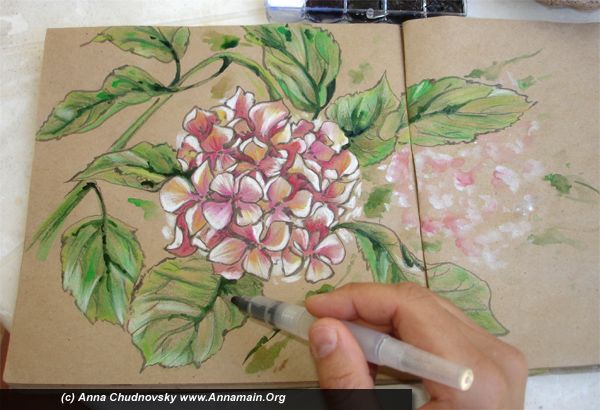
12 - use yellow colour to make several strokes on the leaf and if you used aqua pencils then use waterbrush (or brush) to water the whole picture. Do it carefully on the directions of the strokes.
As you see water make the picture more bright. If you use your brush carefully all strokes will keep it`s directions and the picture will look natural. You can finish on that step if you like it ![]()
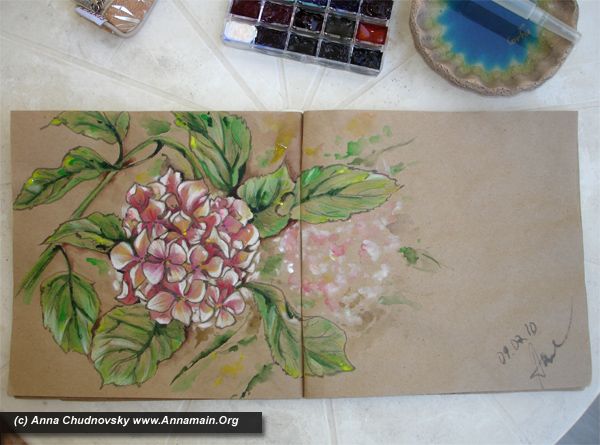
13 - now it`s the time to draw hydrangea`s environment. It creates by several smears of aquarel (watercolors) by a brush. Several spots of pink colour, several of red and more spots of white and our eyes starts to discern another cluster of flowers on the back of the picture.
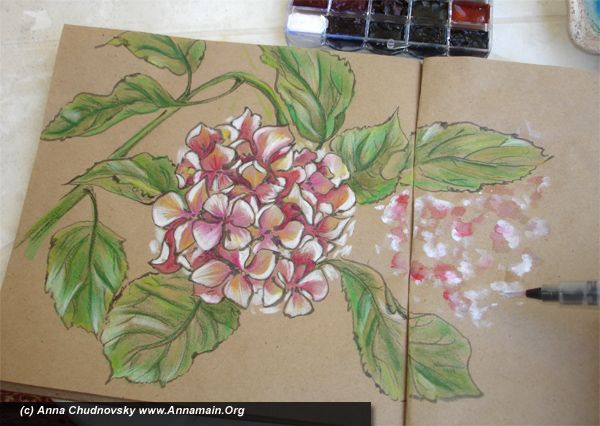
14 - make several long strokes by brush with white aqua colour for the leafs. Several long strokes with green colour creates the leafs on the back.
15 - the final step is to create the illusion of movement. Make several short strokes by brush with dark green colour…
...and several short strokes by brush with yellow colour as you see on the picture. Trust to your own intuition and feelings more and your result will be the best.
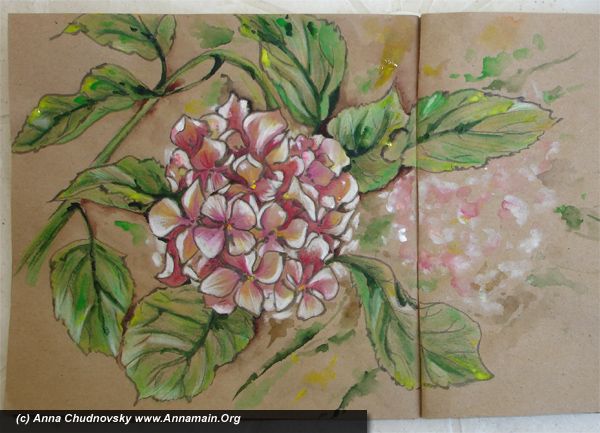
Now the picture is completed. The main idea is to get over the recommendations and instructions to your own feelings. This is the key for all creativity. You can use instructions on the beginning but carefully feel your own perception.
The moment you feel the energy is the gate to your own way, and creativity flows free and your consciousness spreads to the world, silent world without borders, full of energy, music and magic.
This is the way of balance, peace, and the way to feel God - in your picture, in nature and in whole life.